Enterprise MongoDB Database Stack
The MongoDB datastack is used to configure and deploy a MongoDB database into dataspaces and provide MongoDB data services to applications in the SCALE environment.
[MongoDB][mongo] is a cross-platform document-oriented database. Classified as a NoSQL database, MongoDB eschews the traditional table-based relational database structure in favor of JSON-like documents with dynamic schemas, making the integration of data in certain types of applications easier and faster. When using the Enterprise MongoDB Database stack, additional features are included as part of the commercial licensing of MongoDB Enterprise which will be described below.
Additional Features of Enterprise MongoDB
In addition to the capabilities and features of an Open Source MongoDB datastack, the Enterprise MongoDB datastack includes the following features:
- Ops Manager - starting with SCALE pipeline version 4.2, the Enterprise MongoDB database stack integrates with Ops Manager, a web-based management UI for the MongoDB cluster including advanced performance monitoring capabilities and data object management and maintenance
- The latest Enterprise features of MongoDB are provided, including encrypted data-at-rest, in-memory storage engine and advanced security features
- Orchestration of the MongoDB cluster via Ops Manager
- Advanced backup capabilities, including point-in-time recovery features, via Ops Manager
Ops Manager
Ops Manager is a web-based administration tool for provisioning and managing Enterprise MongoDB clusters and for monitoring of the clusters, including health as well as performance analysis.
The URL for Ops Manager will depend on where the datastack is deployed, which is set according to the space in which it is provisioned, as follows:
Within Ops Manager, different datastacks are organized by project (appCode) and within each project, a list of clusters named the same as the serviceName defined for each datastack (this is alo what determines the name of the Helm chart directory within the Git repository for the datastack).
Provisioning
When provisioning an Enterprise MongoDB datastack, the CI/CD pipeline will generate a Helm chart to provision the datastack. Behind the scenes, this Helm chart includes Kubernetes objects defined directly in rancher as well as a special MongoDB object which is a YAML structure passed to Ops Manager that will define to Ops Manager how to provision the new MongoDB cluster.
The specifications of the MongoDB cluster provisioned by Ops Manager will depend on the size the datastack set at time of onboarding, according to the following table:
| Size | Storage per Replica | Number of Replicas | Memory per mongod server |
|---|---|---|---|
| Small | 50 GB | 1 | 3 GB |
| Medium | 100 GB | 3 | 3 GB |
| Large | 500 GB | 3 | 12 GB |
| X-Large | 1000 GB | 3 | 16 GB |
Pipeline Flow
This database stack is deployed as a set of one or more containers and like other types of containers deloyed in the SCALE environment, there are certain common steps required to safely and successfully deploy the database stack. These shared requirements include:
- Staging of the datastack container images in the appropriate Docker image repositories and tagged according to SCALE conventions
- Completion of Unit Testing to validate the database stack
- Gated approvals before allowing deployments into pre-production and production environments
- Audit trail and history of deployment within the SCALE CI/CD Pipeline
Because of the above-listed requirements, the MongoDB database stack is provided in order to support the build and deployment of the MongoDB database in a manner that integrates with SCALE requirements and processes. The flow of deployment includes first a Continuous Integration stage of processing in a pipeline prior to deployment in the Continuous Deployment stages. The Continuous Integration stage focuses on building the application and staging the container image or images in the appropriate Docker image repository ready for deployment. Subsequent pipeline stages deploy the database stack to the appropriate target Kubernetes spaces.
Getting Started in the Azure DevOps environment
Refer to the following link to learn about getting started in the Azure DevOps environment: Getting Started in Azure DevOps Environment
Repository Structure and Azure DevOps Variables
All of the information that instructs the CI/CD pipeline how to provision the MongoDB datastack and to what specifications are contained within a Git repository for the datastack and in a variable group within Azure DevOps. The name of the variable group, which will be found under the Library subsection under the Pipelines menu for the Azure DevOps project, will be enterprise-mongo- followed by the name of the datastack, also referred to as the serviceName for the datastack. This variable group name will also have a suffix of .V3.
The Git repository will be found under the same project, with a repository name identical to the variable group name described above, but without the .V3 suffix (i.e. enterprise-mongo- followed by the name of the datastack, or the serviceName).
Within the variable group will be a number of variables that will be referenced by the CI/CD pipelne during the provisioning process for the datastack. These variables are generated automatically as part of the original process of onboarding the datastack and are dictated by the datastack size and location. One variable of note is the V3.serviceName, which is the name of the datastack as describe above. The other variable of interest is the V3.chartDir which is derived from the serviceName and the project name (appCode). This V3.chartDir is where all of the Helm chart information is stored in the Git repository.
The structure of the Git repository for the MongoDB datastack will contain the aforementioned Helm chart directory. The files under this directory are automatically generated but this directory also includes a file named values.yaml in which changes can be made.
Even in the case of values.yaml, most of the contents need not be changed, however the following describes some areas in which change is potentially or likely needed:
- MongoUsers - a YAML list of users to be provisioned. The initial list may be sufficient, however additional users can be included in this list with the same format as the initial list of users. More details about how to add a user are described below in this document.
Also at the top of the repository is a file called azure-pipelines.yml. This file contains reference to the appropriate version of the CI/CD pipeline logic and some variables unique to the datastack (e.g. MongoDB version, initial password settings, etc).
Continuous Integration and Continuous Delivery Pipelines
Please note that the document "SCALE Concepts and Procedures" contains more details about the specific flow of the application through the CI/CD pipelines
The triggering of the CI/CD pipeline to provision the datastack is manual. Details for navigating to the CI/CD pipeline in Azure DevOps, triggering a run and examining the results can be found here: Continuous Integration and Continuous Delivery Pipelines
Database-Specific Pipeline Configuration
The extends YAML object is a complex object consisting of additional YAML objects. This object is used to extend the V3 pipeline logic (referenced by the repository defined in the resources object) by (a) referencing the correct datastack pipeline entry point and (b) passing a set of YAML objects as parameters to influence the behavior of the pipeline to meet an application teams specific needs.
The extends YAML object consists of 2 objects beneath it:
- template
- parameters
The template YAML object is a single value set to the initial entry point for the V3 pipeline for the MongoDB dbstack, so it should always be defined as follows:
extends:
  template: dbaas/enterprise-mongo-<dataspace repo name>.yml@spaces
where <dataspace repo name> is a repository under a spaces/ group containing datastack-specific settings generated at the time of onboarding the datastack.
TLS Setup
The parameters YAML object is defined immediately following the template object and at the same indentation level. This is the object in which most behavioral changes are made within the azure-pipelines.yml file (in addition to those made within the values.yaml Helm chart file).
Of note in the azure-pipelines.yml file parameters: section is the setting of the YAML object enterprisemongo.security.tls.enabled. Initially this value should be set to false for the first provisioning run of the CI/CD pipeline. However, after this first run, the value of this enterprisemongo.security.tls.enabled YAML object should be set to true and the pipeline rerun in order to enable encrypted communicatioons to the MongoDB datastack.
Additional Configurations
Support for Kong
Support for Kong has been introduced since V4.5. Kong needs to be enabled in values.yaml and any override values files:
kong:
  tls:
    secret:
  dbaas:
    enabled: true
    domain:
PLEASE NOTE: Ambassador and Kong both can not be enabled at once. You can select either but ONLY one at a time.
In addition to helm chart updates, new files are added to support Kong:
Files modified:
enterprise-mongodb.yaml mongodb-tls.yaml
How to Add a New MongoDB User
By default, the Enterprise MongoDB datastack is provisioned with two users (admin and dbuser). The passwords for these users are defined as secret variables in an Azure DevOps variable group containing these password values in the form of secret variables (the values are not visible). In order to add a new database user for an application, follow these steps:
Step 1: Update the values.yaml file under mongoUsers: section
## Example to create user1 in sampledb database with readwrite privilege.
  user1:
    db: sampledb
    password:
    roles:
    - db: "sampledb"
      name: "readWrite"
Step 2: Using the same example, edit the azure-pipelines.yml file to add the variable for the new (e.g. user1) password: mongoUsers.user1.password:
    dataspace:
      helm:
        overrideValues: |
          mongoUsers.admin.password:$(mongoUsers.admin.password)
          mongoUsers.dbuser.password:$(mongoUsers.dbuser.password)
          mongoUsers.user1.password:$(mongoUsers.user1.password)
Note that the password is not defined here; simply referenced from a variable group and passed along to the CI/CD pipeline.
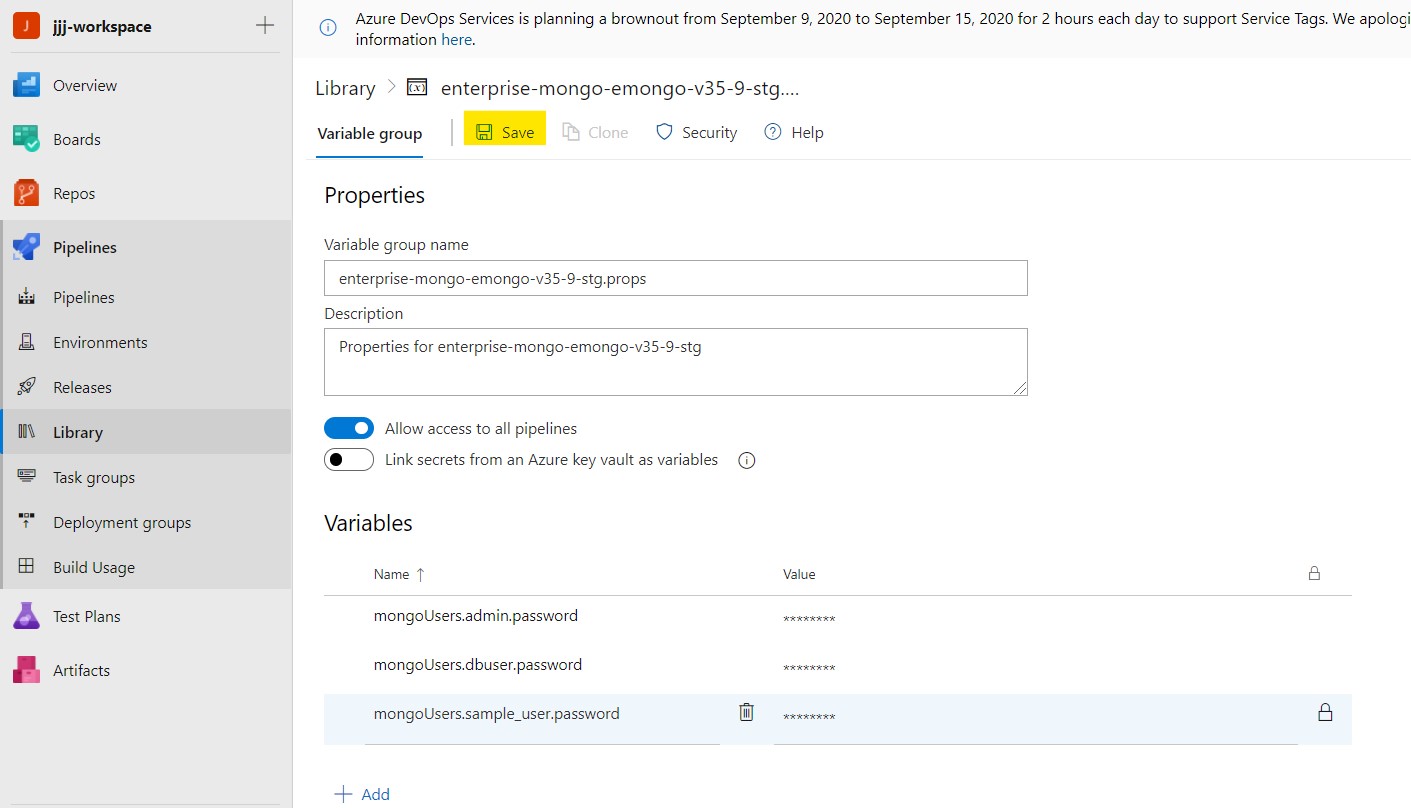
Step 3: Create a variable group (or add to one that has been created for this purpose previously), for example mongodb_users.props. Navigate to the variable group.
Step 4: Once you have opened the appropriate variable group, press the + Add button and add the variable as mongoUsers.
For example to add user1 the variable name as
mongoUsers.user1.password
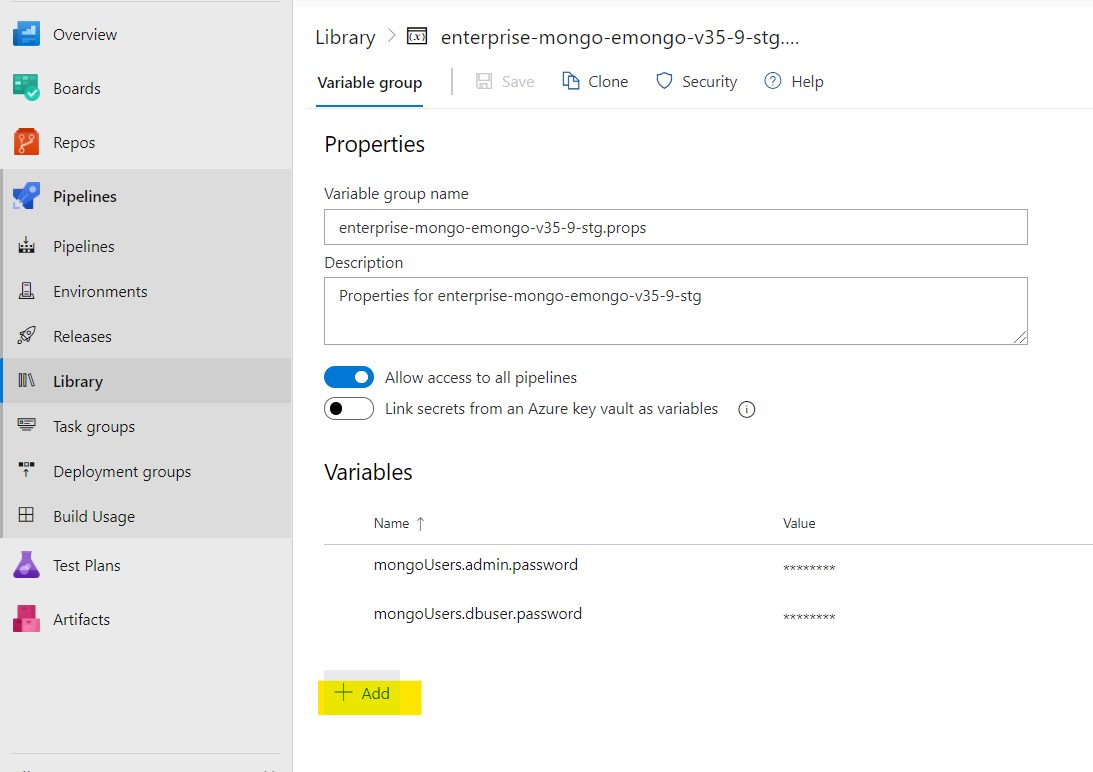
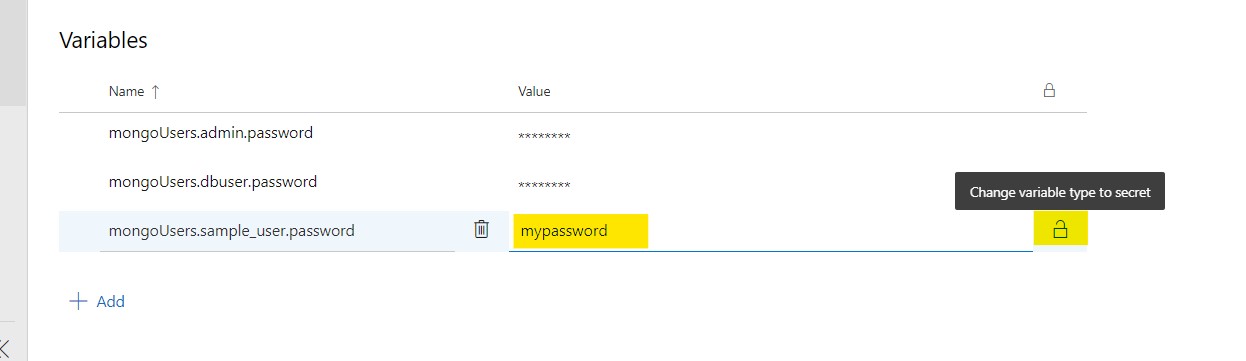
Step 5: Update the password for the user in the values field and click on the lock icon to encrypt and hide the password as a secret value.
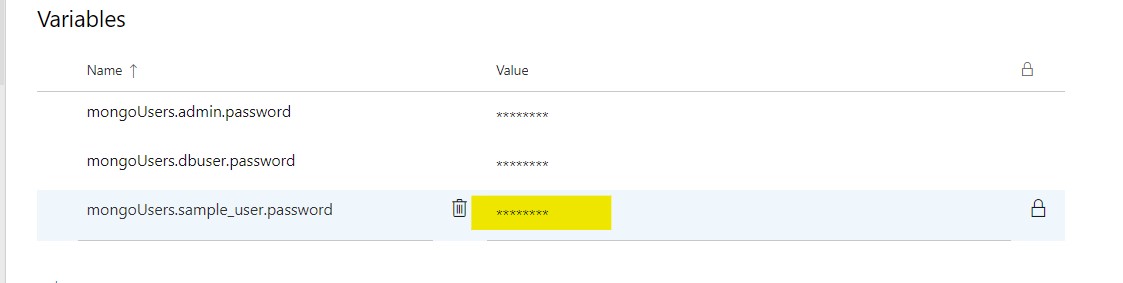
Step 6: Click the "Save" option near the top of the page to save your changes.
Step 7: If a new variable group was created, it must be referenced by the CI/CD pipeline. In order to ensure that its values will be read in and referenced, add a link to the appropriate variable group in the variables: section of the azure-pipelines.yml file. This is done by adding a group: setting to this YAML section, as in the following example:
variables:
  group: mongodb_users.props
  ...
Step 8: Run the pipeline to deploy the new database user added in values.yaml file.
Click the below image to watch the video
![]()
How to Change the Password of an Existing MongoDB User?
To change the password of an existing MongoDB user, use the following procedure, similar to the process of setting the password for a new user:
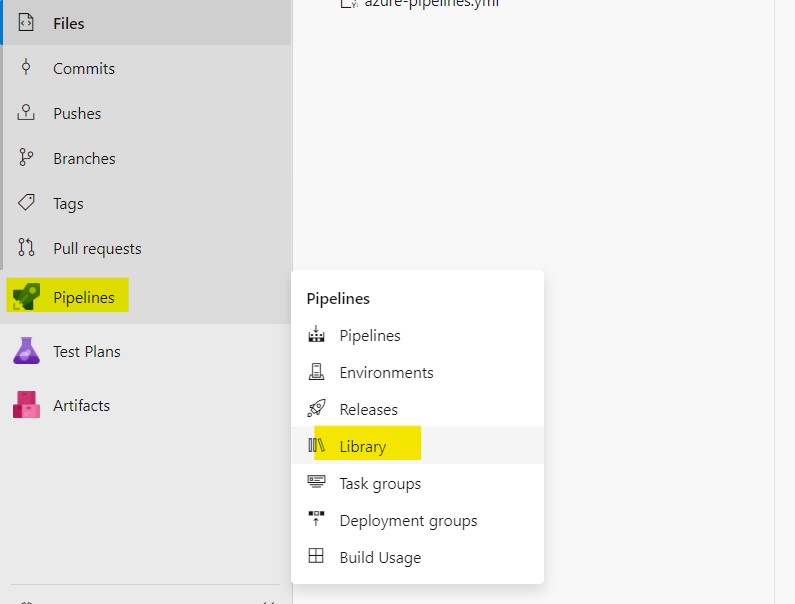
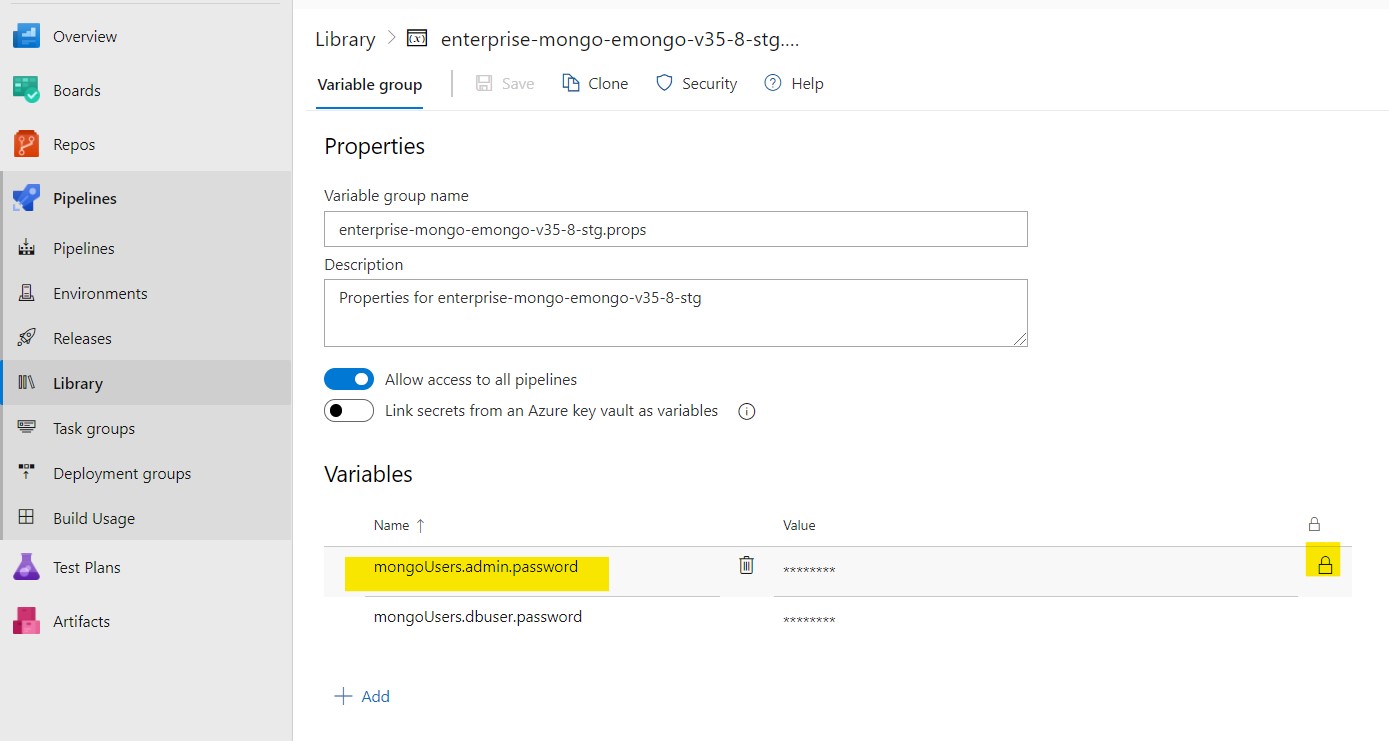
Step 1: Click on Pipelines and select Library.
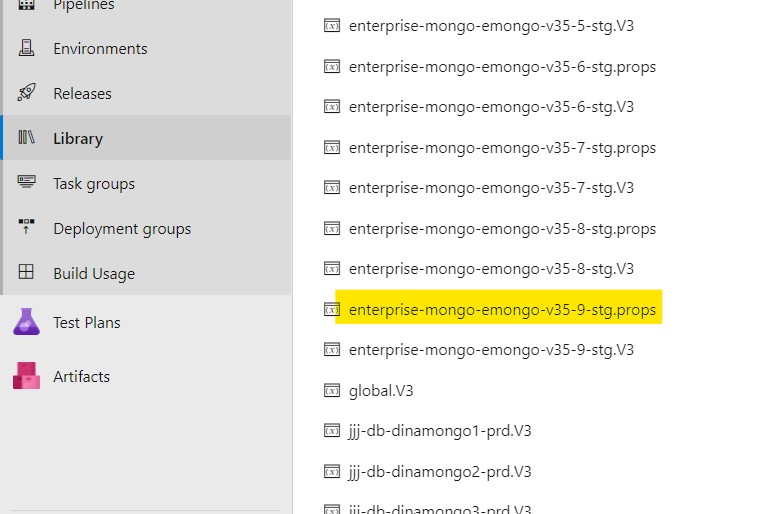
Step 2: Once you are in the Library page, identify and select the variable group containing the secret variable with the password to be changed and select that variable group.
For every MongoDB user, there will be a variable referenced in the azure-pipelines.yml file (in order to pass the secret value to the Helm chart in a values.yaml or similar file) with a matching name in the variable group containing the password. For example, the initially generated users use variables named mongoUsers.<username>.password (where <username> is the MongoDB user name).
Step 3: Highlight the password variable for the user you want to change and click the lock icon in the value field to unlock the field, allowing you to enter a new value (note that unlocking a secret variable does not reveal the existing value; it only allows replacing the secret value with a new value that can be subsequently locked and hidden).
Step 4: Update the new password in the value field and click the lock icon to encrypt and hide the password as a secret value.
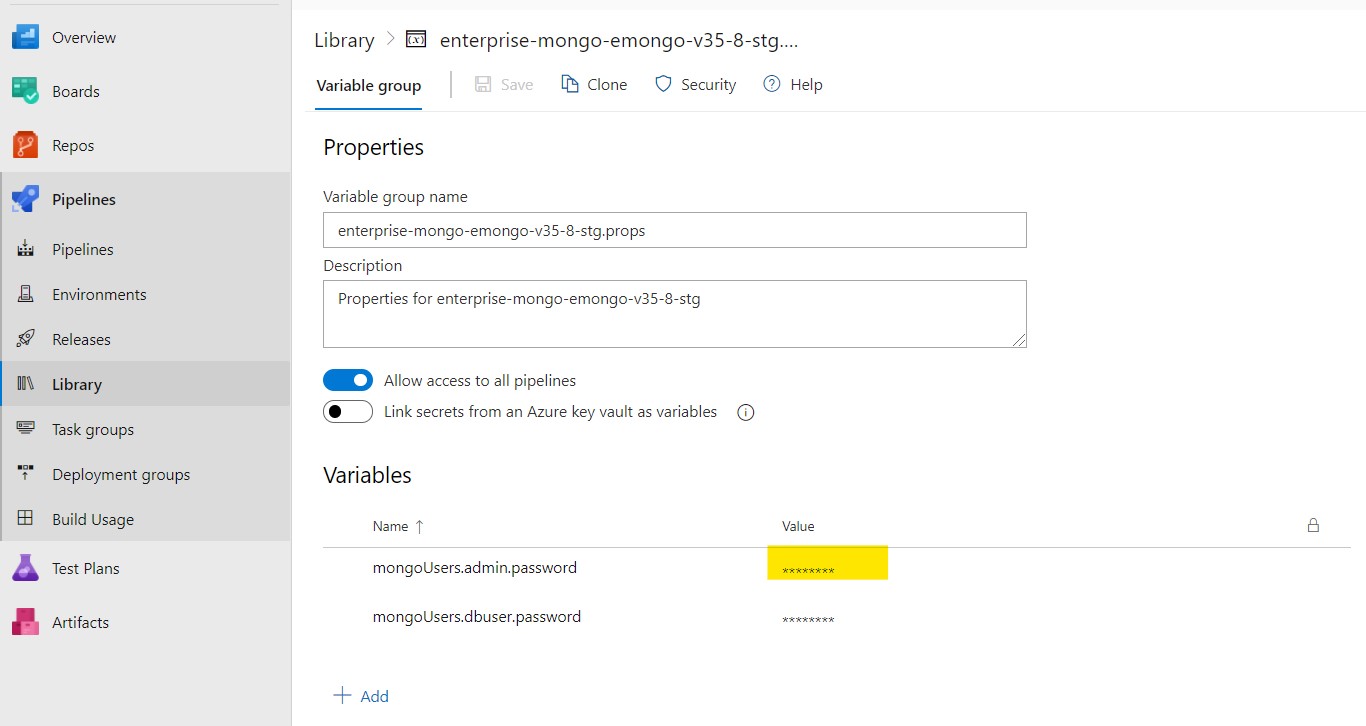
Step 5: Click the "Save" option near the top of the page to save your changes.
Step 6: Run the pipeline to deploy the password changes.
Click the below image to watch the video
![]()
How to enable database backup?
With the integration of the Enterprise MongoDB datastack into Ops Manager, Ops Manager can manage the backups for the datastack. Therefore, use the Ops Manager web UI to perform backup and restore operations and to configure related settings and actions.
How to Expose an Enterprise MongoDB Datastack for Access from Outside of rancher/Kubernetes
Starting in version 3.5 of the SCALE pipeline, an Ambassador edge proxy mapping is available to manage inbound connections to MongoDB . This is enabled by defining new Helm chart values.
The DNS subdomain in which the Ambassador-provided URL for the MongoDB cluster will be exposed will depend on the location of the datastack, i.e. under which SCALE namespace. The following table lists the different types of spaces and the subdomains under which the Ambassaor mappings will be created:
| Space Name/Type | Ambassador URL Subdomain |
|---|---|
| workspace | .prd01d.cloudone.netapp.com |
| devint | .prd01d.cloudone.netapp.com |
| stg-1 | .prd01d.cloudone.netapp.com |
| stg-2 | .prd02d.cloudone.netapp.com |
| prd-1 | .prd01d.cloudone.netapp.com |
| prd-2 | .prd02d.cloudone.netapp.com |
In order to enable Ambassador mappings, set the YAML variable ambassador.dbaas.enabled to true in the Helm chart values files (values.yaml or an alternative one if used).
ambassador:
  tls:
    secret:
  dbaas:
    enabled: true
    domain:
NOTE: The values of ambassador.dbaas.domain and ambassador.tls.secret are left empty in the Helm chart as these are supplied by variables defined in variable groups in Azure DevOps based on the workspace or dataspace to which the database is deployed by the CI/CD pipeline.
The generated Ambassador hostname format will be along these lines (depending on the type of space):
- <service name>-<pod-cardinal-number>.prd01d.cloudone.netapp.com for AWS
- <service name>-<pod-cardinal-number>.prd02d.cloudone.netapp.com for On-Prem HCI
- <service name>-<pod-cardinal-number>.prd05d.cloudone.netapp.com for Rancher AWS
- <service name>-<pod-cardinal-number>.prd06d.cloudone.netapp.com for Rancher On-Prem
For example the pod-cardinal-number values for a 3 member replicaset will be the numbers 0,1 and 2.
On-demand flag to run any workload on AWS on demand nodes
By default when the application deployed on SCALE AWS clusters will be scheduled to run on Spot nodes. If the application team decided to move their application to on-demand nodes for stability and it's handled manually. This demand will provide an option for end-user to choose between on-demand vs Spot during the deployment and also this will all handled part of automation and no need of manual work. We have provide an option for end-user to choose to where their application to be deployed. User can opt in by updating the values.yaml ,by default it is set to false and you can inherit this in values.hostspace.yaml as needed as below .
 ## Flag to deploy workload on ondemand nodes
ondemand:
  enabled: true

# Troubleshooting
If something fails to deploy, the information about why the deployment failed
(or was not even initiated) will be found in the logs of the CI/CD pipeline
and can be tracked down using the instructions at the link listed in the **Continuous
Integration and Continuous Delivery Pipelines** section.

However, additional information may be required either to better troubleshoot a
failed deployment or to investigate the runtime behavior of the Enterprise MongoDB database stack that has been successfully deployed. In those cases, much of the information can be found in the Ops Manager UI and additional informat may also be found in the rancher web console. Information about navigating and analyzing information from the rancher web console can be found here:
[Navigating the rancher Web Console](../references/rancher-console.md)


[mongo]: <https://www.mongodb.com/>